Welcome to part 3 of this 4 part series blog. In previous blog we learnt about Bot Service & LUIS. As mentioned earlier I have divided the blog into 4 parts mentioned below.
- Learning Bot service
- Understanding what is LUIS
- Writing code in Bot Framework to perform tasks (like get weather)
- Integrate bot with Facebook messenger
Part III – Writing code in Bot Framework
In previous post we have learnt about Bot and LUIS separately but now it’s time to tie them together.
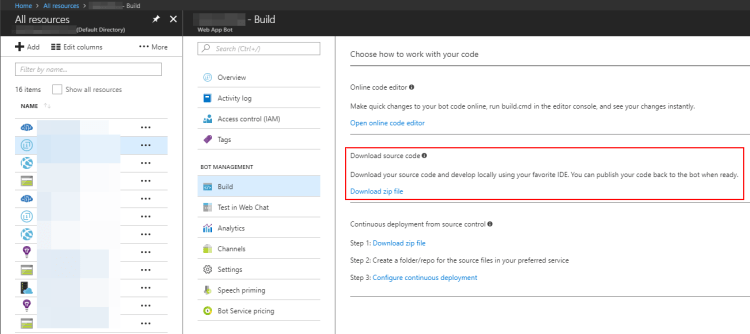
Let’s go to your Azure Portal and login to your account. Navigate to All Resources. Select your Web App Bot. Once in the Web App Bot find “Build” option under Bot Management. Now you will see link under Online code editor section called “Open online code editor”. Click the link to see the files. You can either choose to code online or you can download the source code on your local machine and deploy it whenever you are ready. Microsoft has also provided the Post Deployment Scripts if you wish to do development locally.
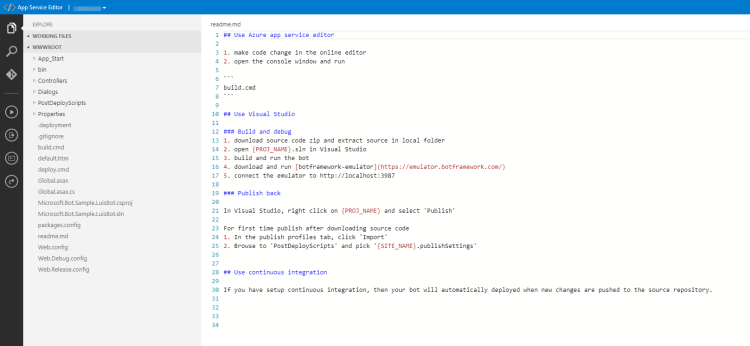
Overview of the code structure
Just for the demo purpose I have kept the same sample files and modify them as needed. We only need to edit two files; BasicLuisDialog.cs and Web.config file.


Updating web.config
To check if this information is auto-populated in your Bot’s App Setting; go to your Bot from All Resources and select “Application Settings”. (shown below)

If this information is not populated, then do not worry I have got you covered. 🙂
1. Retrieve Microsoft App Id and App Password
One of the key things that we will need in the web.config file is MicrosoftAppId and MicrosoftAppPassword.
Follow the steps below.
- Go to your Web App Bot from All Resources
- Click on Settings
- Under “Configuration” section you will find your MicrosoftAppId
- Now, click on manage link. This will take you to Application Registration Portal.
- Find button “Generate New Password” and click it
- This will auto-generate a new password for you. Store it; as there is no way to retrieve it back.


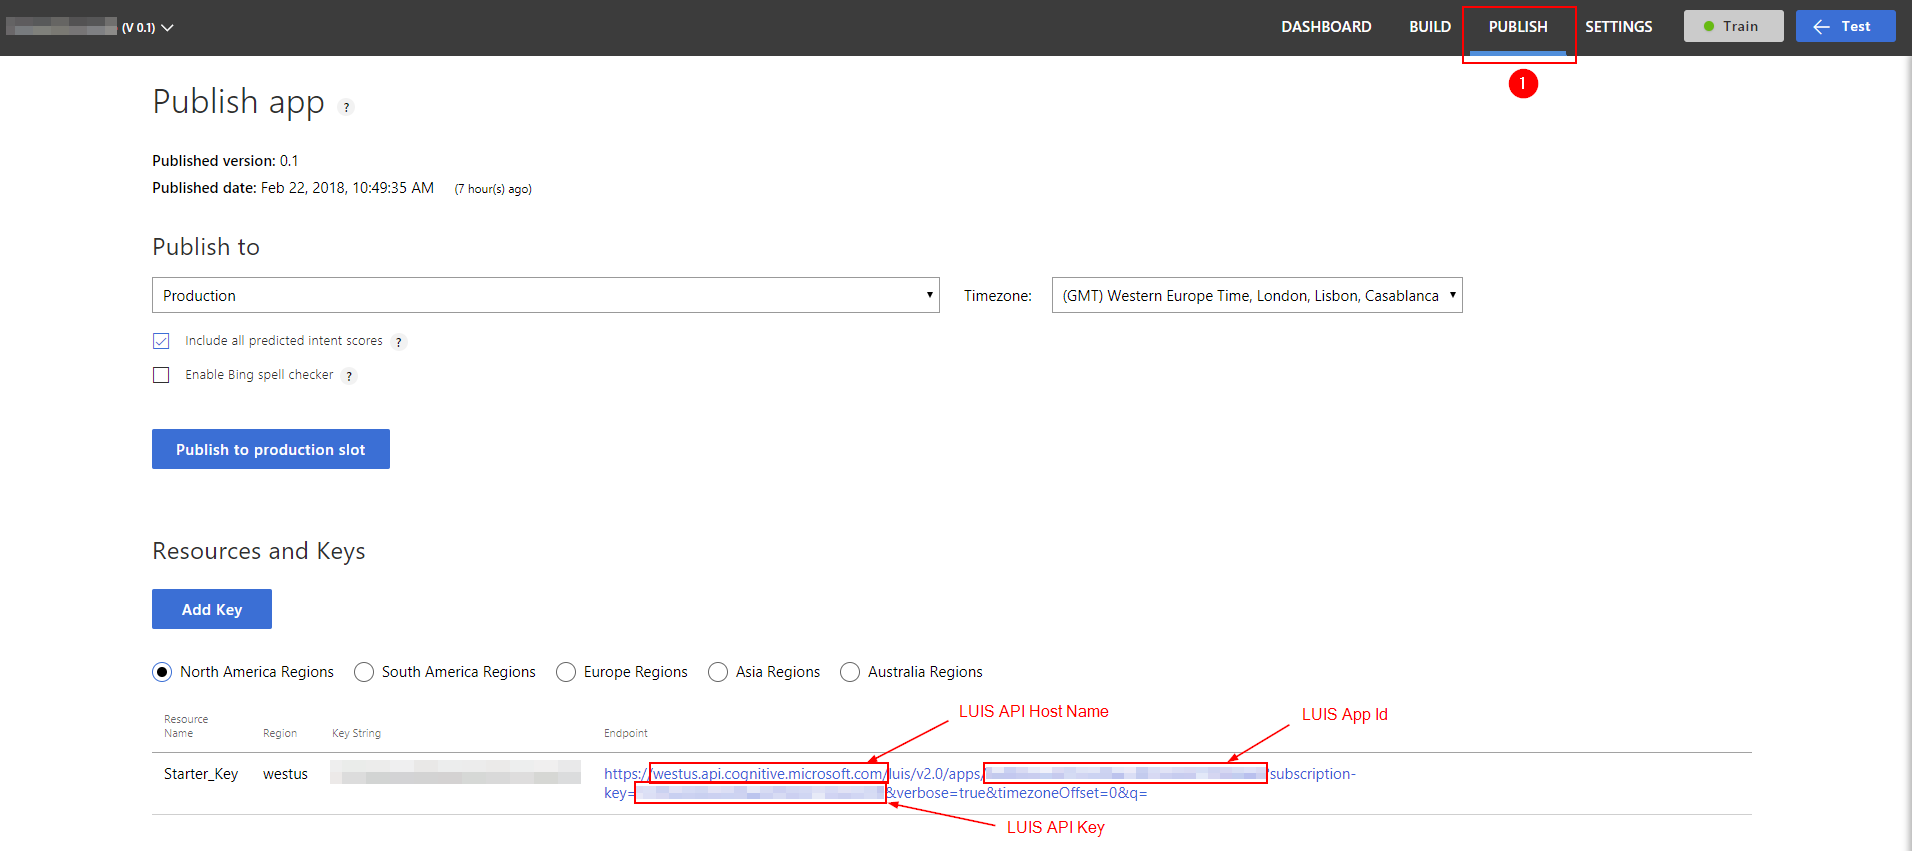
2. Retrieve LUIS Details
To retrieve LUIS app details login to your LUIS portal and open the App that was auto-created as part of the setup.
Now, click on Publish button the top right bar (as shown below). You will find you API Key, App Id and API Host Name.
Finally, your web.config should look like the one shown below.
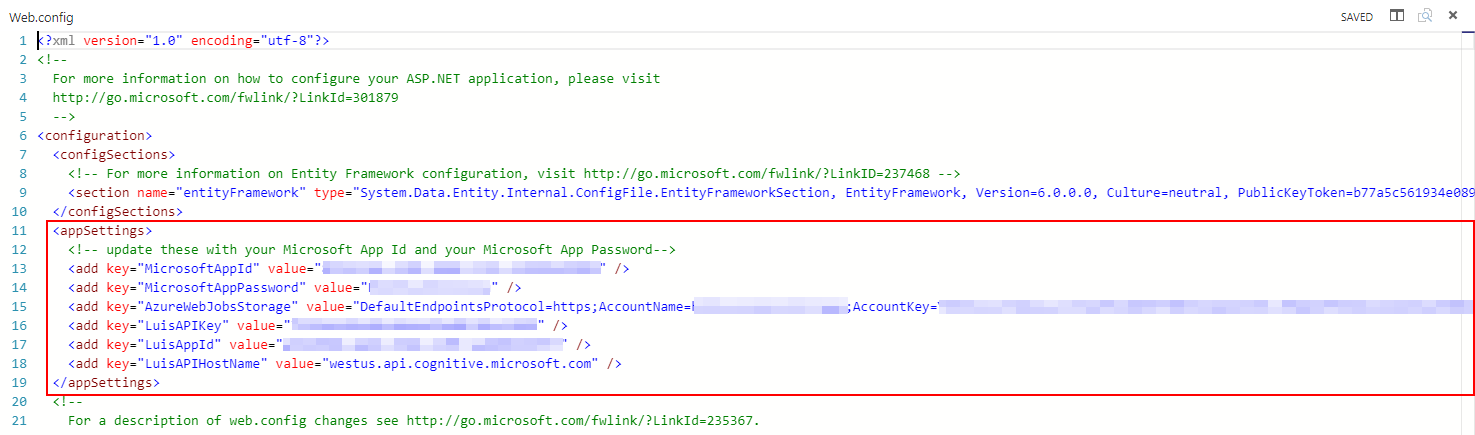
You can test the Bot and it will detect correct intent. If it throws an error means something is wrong with your web.config file.
Selecting one of the Weather App API
I decided to go with AccuWeather API but you can choose any other Weather App. If you decide to go with AccuWeather then you will have to create a user account and fetch the API Keys.
Edit BasicLuisDialog.cs file
Once you have created the Account and fetched the API Keys; let’s switch over to the code part. Go to BasicLuisDialog.cs file and add the following function in the file under BasicLuisDialog class.
[LuisIntent("Weather.GetForecast")]

public async Task WeatherGetForecastIntent(IDialogContext context, LuisResult result)

{

// Your code goes here

string weatherMessage = "Your message to display on the bot goes here";

await context.PostAsync(weatherMessage);

context.Wait(MessageReceived);

}
In my Bot “Weather.GetForecast” is the name of the intent; so make sure you replace the intent name with the one you have provided for your intent. Write your own logic to fetch the weather for the Weather service like AccuWeather in this case. Once you fetch the weather from the Weather service; format your own message that needs to be shown on the bot (in variable weatherMessage) and post it to the Bot’s response.
You can create your own extra classes or folders as per your needs in this solution.
Once you have completed your coding it is time to test your Bot in the Test engine. Head over to Azure Portal and go to the Bot. Click on “Test in Web Chat” under Bot Management.
As per the utterances you had provided during the training of your model; enter the text so that LUIS can identify your weather intent and the expectation is; the code you have written to fetch the weather details using the Weather App will be invoked and Bot will display the message you have posted to Bot’s response context.
Now the bot is ready. Have fun with it. Next, we will see how to connect this Bot with Facebook messenger.
Please leave your comments or feedback and don’t forget to subscribe.

1 comment