If you have started exploring Power Virtual Agent and created few bots you might have observed that all bots look the same. But when you add it to your Website or Portal you want the bot to match your theme. Well, there is a way to achieve that.
Once you have published your bot and ready to integrate it with your Website or Portal; you will go to Manage –> Channels section. Here you will either click on Custom Website and the platform provides you the code to embed on your website. This code looks something like the one below.
<!DOCTYPE html>
<html>
   <body>
      <iframe
         src="https://powerva.microsoft.com/webchat/bots/your-bot-id"
         frameborder="0"
         style="width: 100%; height: 100%;">
      </iframe>
    </body>
</html>
But if you add iframe you don’t get the ability to style it. There is yet another way of embedding the bot on your website using a div tag and some scripts. Below is the code.
<div class="container" style="order: 3; position: relative; width: 400px; min-width: 400px; height: 100%;">
    <div>
      <div role="main"></div>
    </div>
    <script src="https://cdn.botframework.com/botframework-webchat/latest/webchat.js"></script>
    <script>
      document.querySelectorAll('[role="main"]')[0].setAttribute("id", "webchat");
      const styleOptions = {
        // Add styleOptions to customize web chat canvas
        hideUploadButton: true,
      };

      var BOT_ID = "your-bot-id-here";
      var theURL = "https://powerva.microsoft.com/api/botmanagement/v1/directline/directlinetoken?botId=" + BOT_ID;
      fetch(theURL)
        .then(response => response.json())
        .then(conversationInfo => {
          window.WebChat.renderWebChat({
              directLine: window.WebChat.createDirectLine({
                token: conversationInfo.token,
              }),
              styleOptions
            },
            document.getElementById('webchat')
          );
        })
        .catch(err => console.error("An error occurred: " + err));
    </script>
  </div>
This code can be added to Portal or to your custom Website as is. Adding this code will still render the bot with Microsoft styling. To override those style you will have to add a .css file to your website or portal. The css file will somewhat look like the one below.
.main {
    margin: 18px;
    border-radius: 4px;
}

div[role="form"]{
    background-color: black;
}
div[role="log"]{
    background: gainsboro;
}
div[role="status"]{
    background: darkgray;
}

#webchat {
    position: fixed;
    height: calc(100% - 135px);
    z-index: 9999;
    width: 400px;
    top: 132px;
    overflow: hidden;
}
Don’t forget to add the link to your .css file
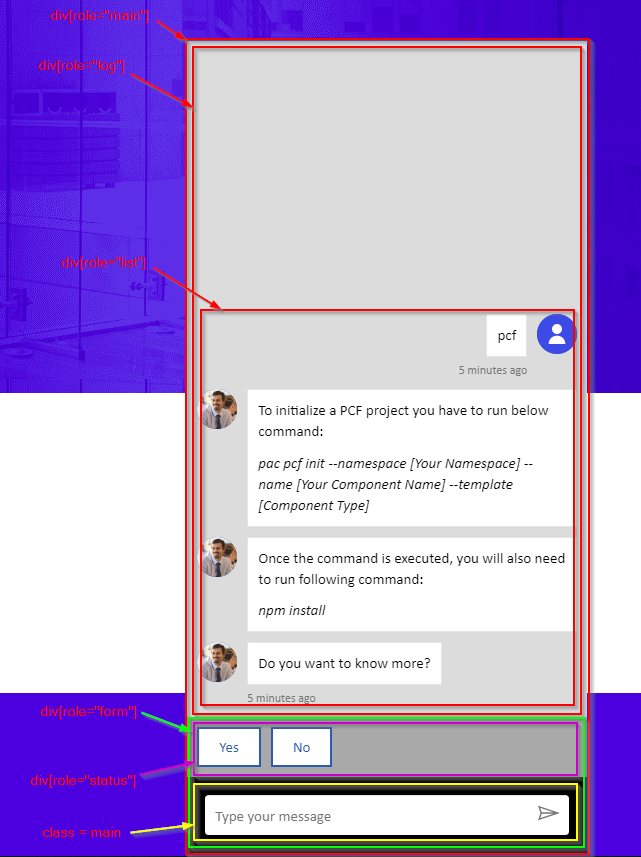
In the above .css file I have not added all the things that are available for customization. But the below image will show all the css properties you can change on the bot.

Do you want to know how to change the icons for Bot and User?
Once you have styled your Chat Bot now you want to change the icons for either the user or bot. You can do so by adding style options. If you look at the code above there was a constant variable declared named styleOptions which had only one option set on it. You can add more options to it.
For changing icon for user –
userAvatarImage: 'https://cci-prod-botdesigner.azureedge.net/20200326.4/img/ef9b3564120c0823ad37d8f61b098698.svg'For changing the icon for bot –
botAvatarImage: 'https://docs.microsoft.com/en-us/azure/bot-service/v4sdk/media/logo_bot.svg'Once you add those options the constant variable should look like below:
const styleOptions = {
           // Add styleOptions to customize web chat canvas
           hideUploadButton: true,
           botAvatarImage: 'https://docs.microsoft.com/en-us/azure/bot-service/v4sdk/media/logo_bot.svg',
           userAvatarImage: 'https://cci-prod-botdesigner.azureedge.net/20200326.4/img/ef9b3564120c0823ad37d8f61b098698.svg'
        };
Demo
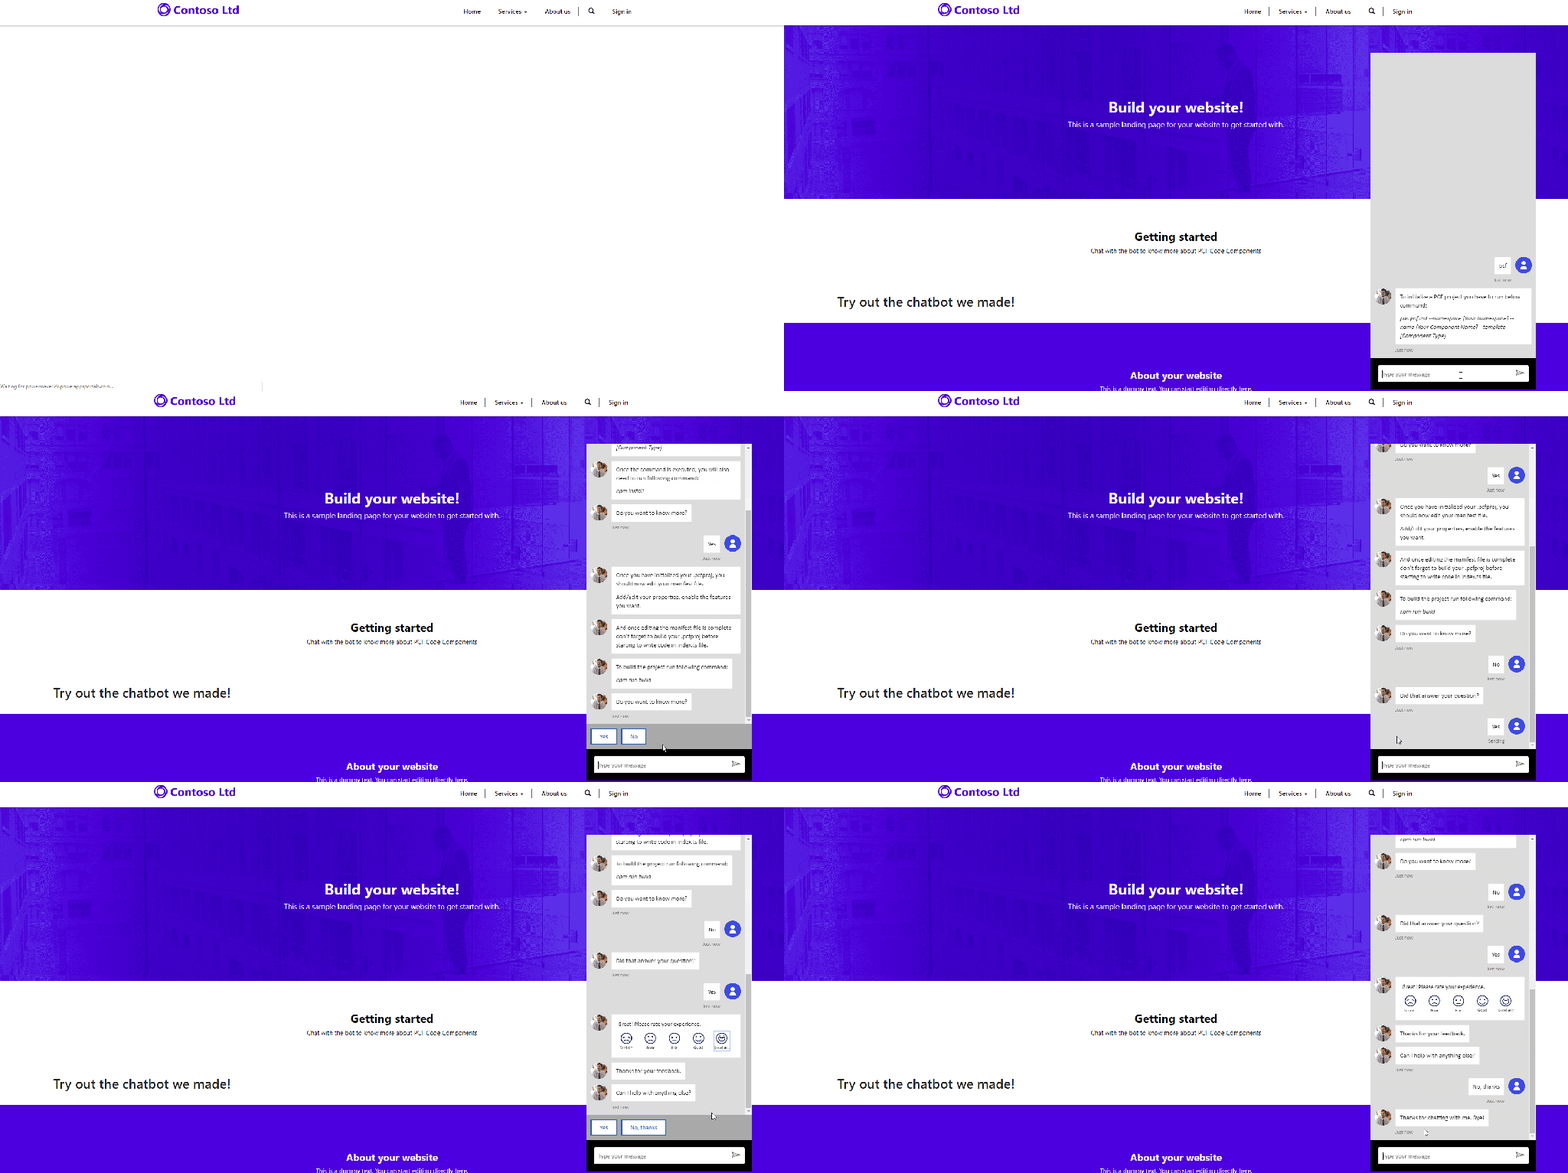
Let’s take a look how it works overall.

Hope you find this useful.
For more content subscribe to my blogs and follow me on:
LinkedIn: https://www.linkedin.com/in/danishnaglekar/
Twitter: https://twitter.com/Danzmaverick
GitHub: https://github.com/Power-Maverick
YouTube: https://www.youtube.com/c/PowerMaverick
ProDev Newsletter: http://www.powerplatformdevelopersweekly.com/
Hey Danish, have you styled a webchat client that created async? I have done this so that I can create token with each connect, but now I cannot style the webchat div. Any suggestions? Here is the async function
async function setupchat() {
const res = await fetch(‘https://xxx.azurewebsites.net/api/token’,
{ method: ‘GET’});
const { token } = await res.json();
window.WebChat.renderWebChat({
directLine: window.WebChat.createDirectLine({ token })
}, document.getElementById(‘webchat’));
document.querySelector(‘#webchat > *’).focus();
};
LikeLike
The code you have provided looks like the Bot created in Azure and not using Power Virtual Agent. I have not tried styling the bot built in Azure.
LikeLike
Hi Mav! how exactly can this be implemented into a sharepoint? i have not found one conclusive end to end guide on this topic?? divs are not usable with embed webpart and html is not usable so what am i missing??
LikeLike
I have very little experience with SharePoint. Have you looked at this post – https://powermaverick.dev/2020/09/02/add-chat-bot-on-wordpress-site/ (maybe this might help).
LikeLike