It has been couple of months since the official release of Power Platform Build Tools. It is a necessary tool to automate your build and release cycles. This saves so much time from manual deployments. If you had preview version of Build Tools, then make sure to download the non-preview version.
Download Power Platform Build Tools from Marketplace.
If you haven’t read Alex Shelga‘s 3 part blog on CI/CD then I highly recommend reading it. In this post, I will be explaining two type of connection for connecting to Build Tools and which tasks each of those connection support.
First to create the connection you have to navigate to Project Settings and under Pipeline category you will find Service Connection.
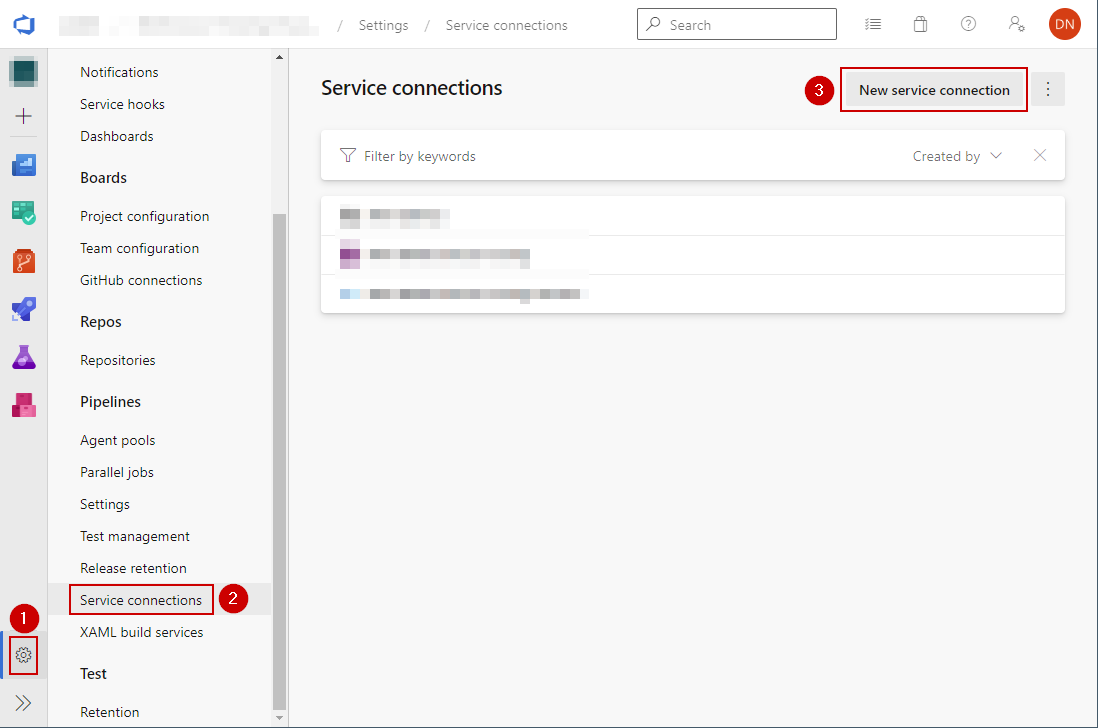
Here you will get list of all connections available to you. As mentioned above there are two type of connections when working with Build Tools; one uses Username & Password for authentication while the other uses Application Id and Client Secret (service principal). The later is the recommended approach and also works best for MFA. So, if you have MFA configured you will have to go with Application Id and Client Secret connection.
Connection with Username & Password
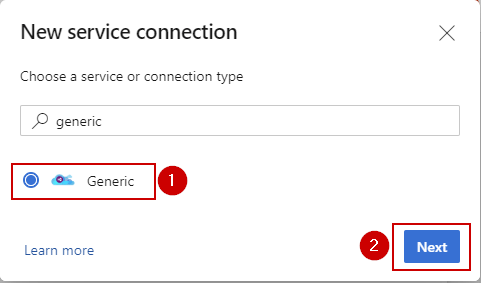
In the new connection panel, search and select “generic”. Click “Next”.
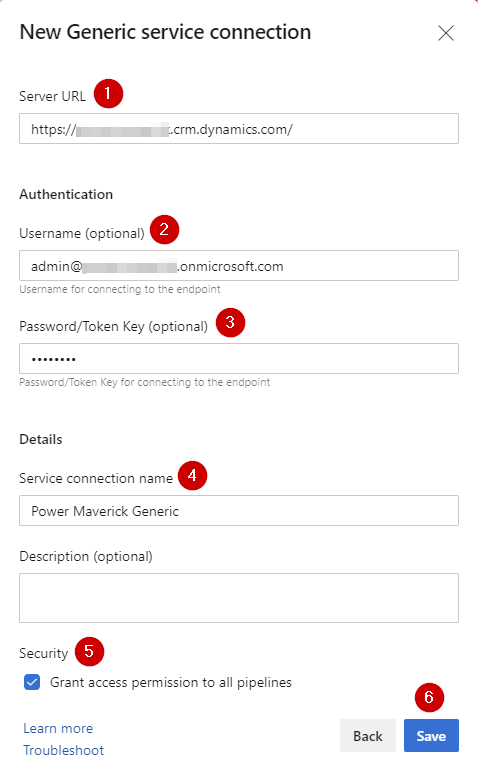
On next page, enter your environment URL, Username and Password; also specify Service connection name. If you will be using multiple pipelines then make sure to keep “Grant access permission to all pipelines” checked. Once all required information is populated, click “Save” and your connection would be ready to use.
Application Id and Client Secret (service principal)
Another method of creating the connection is using Service Principal authentication. This is the recommended way and also supports multi-factor authentication (MFA).
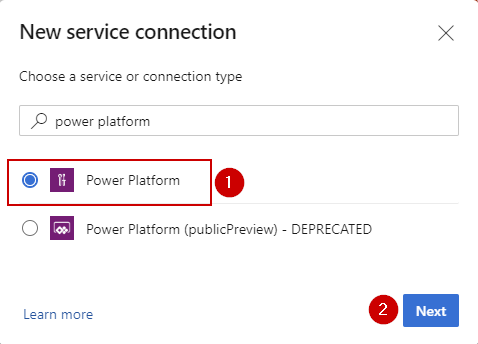
In the new connection panel, search and select “power platform”. Click “Next”. The deprecated connection may show up if you had installed the preview version of Build Tools. Make sure not to select deprecated connection.
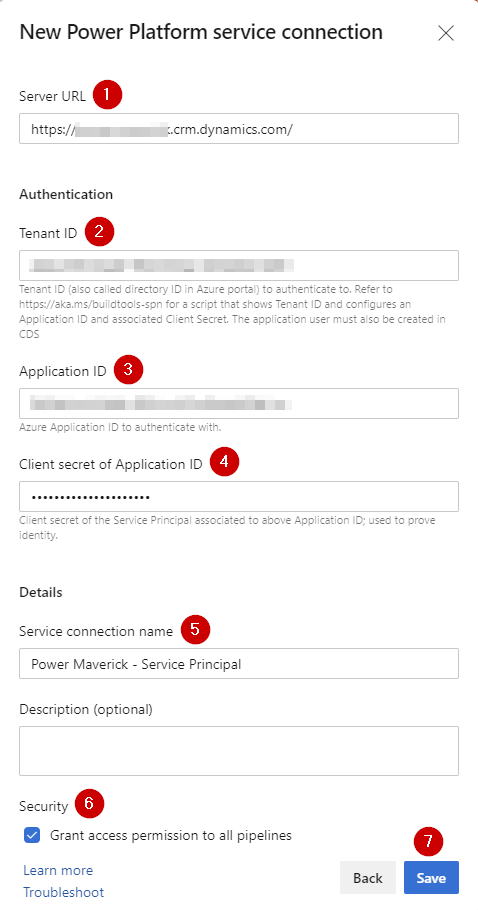
First create the App Registration in Azure and Application User in CDS; if you want to know how to do this then read my post on it. On next page, specify your environment URL, tenant id, application id and client secret. Also, enter a proper name for your service connection. Similar to what we did for the above connection, as per your requirement you may want to keep “Grant access permission to all pipelines” checked. Once all required information is populated, click “Save” and your connection would be ready to use.
How to use them on tasks?
Once the connections are created, you can now create a build pipeline by going to “Pipelines” and clicking “New pipeline”.

Go through the steps to create your pipeline as shown below. Once saved we will look at how to add individual tasks.
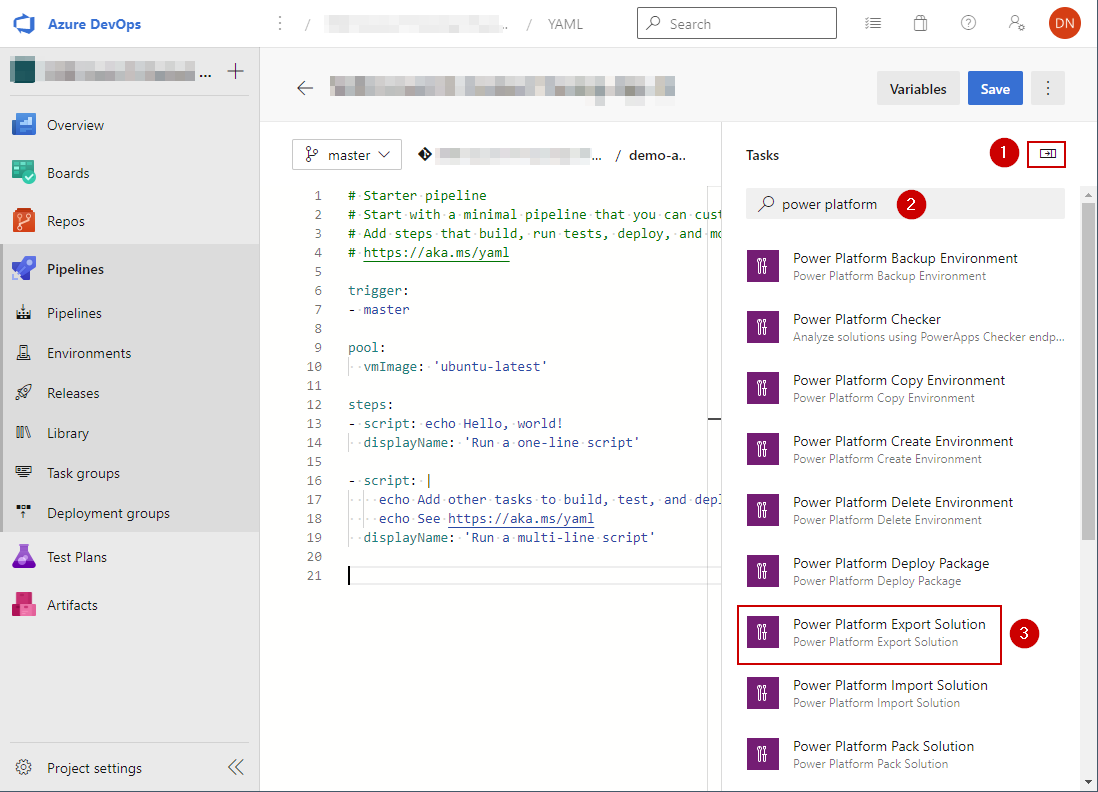
Now, let us add some tasks to the newly created pipeline. To add the task, open the “task assistant” and search for “power platform”. This will display list of all tasks related to Power Platform. Choose the one that you want to work with; in our example we will choose “Power Platform Export Solution”.
When you choose a particular task you will be taken to the task configuration panel; where you can select the authentication type. If you picked “Username/password (no MFA support)” then you will be provided with the list of generic connection we created above. But if you picked “Service Principal/client secret (supports MFA)” then you will be provided with the list of Power Platform connection with service principal.
Connections used by each Build Tools tasks
When we build the pipeline first task that should be added before any Build Tools is “Power Platform Tool Installer”. This particular task do not need any connection.
Below table defines which tasks supports Generic connection or Power Platform connection or both.
| Task Name | Connection Support |
|---|---|
| Backup Environment | Both connections |
| Checker | Power Platform only |
| Copy Environment | Both connections |
| Create Environment | Both connections |
| Delete Environment | Both connections |
| Deploy Package | Both connections |
| Export Solution | Both connections |
| Import Solution | Both connections |
| Pack Solution | No connection needed |
| Publish Customization | Both connections |
| Reset Environment | Generic only |
| Restore Environment | Generic only |
| Set Solution Version | Both connections |
| Unpack Solution | No connection needed |
| Who Am I | Both connections |
Hope this helps.
For more content subscribe to my blogs and follow me on:
Don’t forget to subscribe to my Power Platform ProDev Newsletter

Handy table of tasks and supported service connection types. : )
LikeLiked by 1 person
For the step where I am creating a new Power Platform service connection, where would I find my Azure Application ID and Client Secret?
LikeLike
https://powermaverick.dev/2020/08/10/create-application-user-in-dataflex-pro-cds/
The link is also mentioned in this post as well. 😊
LikeLike
For the step where I am creating a new Power Platform service connection, where would I find my Azure Application ID and Client Secret?
LikeLike
https://powermaverick.dev/2020/08/10/create-application-user-in-dataflex-pro-cds/
The link is also mentioned in this post as well. 😊
LikeLike